Teledermatology Camera Procedures and Settings
Canon Digital Rebel XT (350D)
Brian C. Madden, Ph.D.
The Skin Appearance Laboratory
Department of Dermatology
University of Rochester
24 January 2011
Introduction
Digital photography is the foundation that enables a visually-oriented specialty such as dermatology to make the transition to telemedicine. Even with this filmless technology, it is not easy to capture high quality images consistently in a production environment. Of the many attempts at teledermatology that have come a cropper, an appreciable number cite poor images as the paramount reason for the failure. Hopefully, this note will provide you with the information necessary to help get your image acquisition started on the right foot. It will be a periodically updated reference document. The most recent version will contain the cumulative best estimate of the set of equipment, parameters and procedures that have been found to produce diagnostic-quality skin images. The details of the process will be modified over time as resources and experience dictate (as reflected in the date and version number). When the process stabilizes, this note will be migrated to an online (possibly VRML) resource. A full description of our teledermatology model is laid out in a set of six technical reports (that will be available on our VISN 2 Telemedicine website).
While it is not necessary to maintain a particular camera configuration, doing so helps to minimize the diversity of the equipment that needs to be supported, avoids differences in image detail in photographs obtained across clinics, and reduces training and documentation complexity. Nonetheless, any camera system shown to possess the capacity to capture diagnostic-quality images will be accommodated. The selection criteria will depend on how camera features and operator performance are found to impact diagnostic accuracy. There will be a trade between individual preference and uniformity of imaging across patients, exam rooms and clinics. This relation will inevitably change as the current camera selection’s relative advantage in the marketplace diminishes and a new selection brings with it a different feature set.
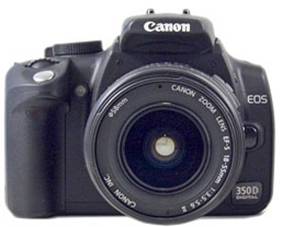
The Canon EOS 350D – Digital Rebel XT
This document describes an image capture procedure based on the Canon Digital Rebel XT camera and some related accessories (a list of suggested components is included below). Use in the exam room has shown this camera to be an excellent choice – a good compromise among image quality, available features, price and ease of use. While this note may be read by itself, it will be helpful to have access to both the camera and the manufacturer’s documentation when reviewing the settings and procedures.
Recommended Equipment List
Canon EOS Digital Rebel XT Camera
Canon EF 100mm f/2.8 USM Macro Lens
Canon Macro Twin Lite (MT24-EX)
Hoya 58mm Clear Pro 1 Multi-Coated Glass Filter
8 Duracell AA 2400 mAh NiMH Rechargeable Batteries
Duracell Rechargeable ACCU NiMH Battery Charger (CEF15NC)
A backup Canon Li-ion Battery Pack (NB-2LH)
Canon AC Adapter (ACK-DC20) with an AC extension cord
2 SanDisk Ultra II 1.0GB CompactFlash Cards
Canon Deluxe Backpack (200EG)
Camera Prep
Batteries are the fuel that allows teledermatology to operate. Prior to the start of your clinic, be sure that the camera’s battery pack and the macro flash batteries are sufficiently charged to meet the need of the expected patient load. Experience will show over time how many flash exposures can be obtained with these batteries given your clinic workflow. If either the battery pack or the rechargeable AA flash batteries need to be swapped out, they should be placed in an appropriate charger straightaway. Even if the camera and the flash have charged batteries, check to see if the spares are either charged or are charging.
Rechargeable batteries come in a number of varieties. Follow manufacturers’ recommendations as to use. For some batteries, the life and capacity are best maintained if they are fully discharged before recharging. For other types, it does not matter. For some batteries and chargers, it is recommended that the batteries are removed from the charger when fully charged. For others, it does not matter. The rechargeable AA batteries for the flash unit may be purchased in packs of four. It is good not to mix batteries that may have different charge or use histories or that have different storage capacities. When the storage capacity is sufficiently degraded due to extended use, a set of batteries should be properly disposed of together.
The Canon Digital Rebel XT is powered by the NB-2LH, a Li-ion battery pack. Unlike some NiCad and NiMH batteries, Li-ion batteries don’t suffer from a memory effect that requires the battery to be fully discharged before recharging if battery capacity is to be preserved. The Canon manual does suggest, however, that the charger be unplugged after the battery is charged. If this proves to be a concern, the charger can be controlled by an inexpensive timer set to the normal charge duration (1.5-2 hours). Both the battery icon on the camera and the level indicator on the charger will provide a coarse estimate of the available charge in the battery pack. On the other hand, most AA battery chargers simply indicate charged or charging.
Rechargeable batteries are a consumable. Best operation will be obtained by following the manufacturers’ operating instructions but it should be recognized, especially in a production environment of nearly constant use, that eventually they will wear out and need to be replaced. As a backup in the event of either battery or procedural failure, the purchase of an AC adapter will allow electrically tethered operation of the camera (not including the twin flash unit). Most exam rooms are small and have a number of power receptacles so the cord supplied with the adapter may provide adequate range. However, if the ability of the caregiver to acquire images with the desired pose is restricted, then an AC extension cord should be acquired. A pack of four standard AA batteries can serve as a backup for the flash power. Dispose of regular batteries properly. It is not a good idea to store them in the kit with the rechargeable batteries. If mistakenly inserted in a recharger, acute thermal problems may ensue. It should be noted that stored batteries, either in the camera or loose, tend to lose their charge over time and need to be tested in the equipment prior to being relied upon either as primary or as backup power.
When preparing the camera for use, remove the protective lens cap, if present. It is suggested that a strap not be used to attach the lens cap to the lens. It is also suggested that the camera neck strap not be used. While it is true that a lens cap can easily be misplaced and that cameras do bounce really poorly, it is a greater truth that long dangly items are an inconvenience and a hazard in the exam room. In addition, as part of your individualized skin imaging protocol (i.e., what works for you), there should be a safe and convenient storage place for the camera in the exam room when not actually in use.
If secure storage is available after hours, it is better to leave the unit assembled. If the camera is to be used at multiple locations, it would be desirable to obtain a padded camera bag designed for the purpose such as the Canon Deluxe Backpack (200EG). Incorporating handling and storage requirements into your protocol will lessen the likelihood of losing any of the many essential, mostly expensive, little parts that make up the capture unit.
Care should be exercised when handling the camera. Physical shock or exposure to liquids can damage the optics and electronics. Nothing should ever come in contact with the coatings on the glass surfaces of the lens. The only accessible optical surface should be the front surface of the UV filter.[1] This is a non-critical surface and can be safely cleaned with a nonabrasive tissue or, if necessary, a damp soft cloth. Hands should be kept clean when using the camera. Powders, gels or liquids will get into the crevasses and foul the buttons and dials. As with computer keyboards and smartphones, digital cameras were not designed with the exam room in mind and pose a substantial risk of nosocomial infection. Workflow and staffing considerations should be adjusted to minimize interleaving patient and camera contact. Consult the camera manual or manufacturer for details of safe camera cleaning procedures and apply them as appropriate.
The black plastic caps that cover the camera and lens openings are not packing material to be discarded. An unprotected camera or lens will rapidly become unusable due to accumulated debris. It is best to place the components on a flat surface when attaching the lens to the camera body. When removing the protective covers, orient the components so the openings are vertical. This lessens the opportunity for gravity to work against you by transporting material from your clothing or person into a horizontal target. Align the red dots, seat the two parts, and rotate the lens clockwise. There should be a satisfying click. Never force anything. To release the lens, press the black button on the front of the camera body near the lens junction and reverse the process.
Review of the exposed optical surfaces should be part of the camera setup and storage procedure. Exam rooms are not ISO Class 1 cleanrooms. Foreign material will become affixed to glass surfaces and that material will be less than transparent. Occasionally taking images of uniform white surfaces and importing those images into an image manipulation package such as Photoshop (Adobe) will allow the contrast introduced by the debris to be made highly visible thereby facilitating its removal.
If the macro flash unit is not normally stored attached to the camera lens, remove the UV filter from the macro lens (where it should be kept during storage of the lens) and screw it onto the flash bezel. The bezel will not fit on a lens that has a filter in place. Be sure that the UV filter is devoid of smears and any particulate matter. The UV filter is used to protect the front surface of the macro lens during patient imaging. If at all possible, avoid touching the actual lens surface. Body fluids and detritus do not improve the ability of the coatings to form a sharp image. Even dried on material can usually be removed through gentle application of a soft, damp cloth. Attach the flash bezel to the lens, the twin flash elements to the bezel, and the flash control unit to the hot shoe (being sure to finger-tighten the knurled fastener at the base).
The position of the two flash units will affect the quality of the obtained images. Be sure that both flash elements are oriented properly both rotationally about the lens and angularly with respect to its optical axis. Under normal operation, the two flash units should be positioned diametrically opposite one another and should be oriented perpendicularly to the major axis of the various body parts (head, arm, leg, trunk) being imaged. The flash bezel rotates about the lens to allow both portrait and landscape image capture while preserving the desired illumination convention. (NB: With the time pressures of the exam room, it is a common mistake to forget to return the rotated bezel to its default position.) The large fiducial marks on the flash bezel indicate proper diametric alignment. Care should be taken to monitor the camera configuration since the twin flash elements have only weak detents holding them in place and can easily become misaligned through normal handling.
Similarly, the orientation of the twin flash units should be set parallel to the optical axis of the lens. Again, the large fiducial marks indicate proper (parallel) alignment. Initial tests have shown that converging the flash units increases the specular reflection in the image, while diverging them results in an umbra in the region of interest.[2] An additional capability that warrants further examination for inclusion in your toolkit of imaging tricks is the use of asymmetric illumination to aid in the apprehension of surface relief. The ability to reduce selectively, or to eliminate entirely, the light from one of the flash units can be used to make 3D prominences stand out visually in 2D images. This capacity of asymmetric illumination is available with some ring flashes as well. Again, whether due to changes made for custom imaging effects or accidental shifts from handling, a misconfigured flash unit will produce suboptimal images. A check of the camera configuration should become reflexive prior to capturing diagnostic images.
Review the camera settings prior to imaging patients. You will not always be able to catch the presence of unacceptable levels of image degradation using the camera display alone.[3] Image subsampling and interpolation algorithms implemented in your camera are required to allow megapixel images to be seen on the much smaller LCD. The Digital Rebel XT’s LCD screen (approximately 420x280 pixels, a nearly 70:1 reduction in pixel count from the 3456x2304 pixel Large/Fine setting) results in a less than optimal utility for reviewing image quality. Care should be taken in general when relying on camera displays since, although the pixel counts of both sensors and LCDs in new cameras have been increasing, they seldom do so proportionately.
Be sure that the CompactFlash card has sufficient space for the imaging requirements of the expected patient load or that the spare has enough backup capacity. This precaution will ensure that you are not forced to download images while there is a patient in the exam room. It is not always possible, but it is a good idea, to download patient images often. It is also good practice to ensure that the images are reviewed before the patient leaves the clinic and, while no system is perfect, the images are likely to be safer once in the workstation than if left in the camera.
Camera Settings
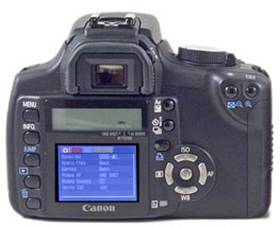
Cameras operate in a number of configurations that adjust performance to accommodate different imaging goals and different ambient conditions (sports/still life, portrait/landscape, sunlight/shadow). A particular camera configuration is determined by physical (e.g., rotating a lens to a particular focal length) or electronic actuators (e.g., using pushbuttons or dials to scroll through menus). The electronic camera settings are usually (but not universally) ‘sticky’ - the associations remain constant even though the camera is power-cycled. Depending on the function (and the camera model), the operative selections may change when the camera mode is changed. For example, for the Canon 350D, fewer settings are accessible when in the Basic Zone (which includes Fully Automatic) than when in the Creative Zone (which includes Aperture Priority). Care should be taken to ensure that all appropriate alterations are made to the available settings when the mode is changed. It is a good idea in any case to check the camera settings now and then during the day. Modern cameras are covered in buttons and dials that can be inadvertently activated. It is also possible that someone else may have had access to the camera since you last used it. Pressing the Info button on the 350D will cause many of the current settings to be displayed on the LCD screen.
In the version of teledermatology we propose, there are two forms of diagnostic image acquisition – the contextual image and the morphological image. Adjusting the camera to capture these image classes supplies the motivation for the selection of most of the camera settings. Of the two, the contextual images afford the broader view of the patient’s skin. The same 100 mm macro lens can be used to capture a range of scale simply by varying the working distance.[4] At a distance of 5 meters, the longer axis of the field of view spans about a meter on the body. This field of view is sufficient to provide a visual sense of the patient normally obtained implicitly in a face-to-face exam.[5] Intermediate working distances can be selected that are adequate to provide views of moderate portions of the body. These medium views not only yield a sense of non-involved skin at higher resolution but also establish the relation between anatomical landmarks and the area of interest so that the location of the image on the body is evident.
Differences in the imaging requirements between contextual and morphological data result in two distinct camera modes being used. In Fully Automatic mode (□), the camera exhibits the flexibility necessary to capture skin images taken at varying distances from the patient. To obtain this camera configuration, the Mode dial (a black disk on the camera top just to the right of the hot shoe), is rotated until the □ is at the 9 o’clock position just opposite the black striation. At these intermediate distances, the available depth of field (DOF) renders an in-focus skin surface fairly easy to obtain. On the other hand, contamination from light sources other than the flash unit can result in chromatic variation that makes some clinical judgments (e.g., erythema) more difficult. In Fully Automatic mode, Automatic White Balance is engaged to reduce chromatic shifts due to changes in illumination.
Morphological images normally provide the greatest diagnostic detail to the clinicians. The Canon Digital Rebel XT camera with the 100 mm macro lens can focus on surfaces as close as 15 cm in front of the lens. Capturing images at this distance yields excellent resolution (a 27 by 18 mm field of view, about 128 pixels/mm on the skin). With scores of pixels per mm, the morphological images provide considerable detail.[6] In addition, acquiring images at a fixed distance provides a uniformity that can assist comparisons across lesions and over time. However, taken alone without context, these close-ups often appear to be just so much mystery meat.
Because of the need for high resolution to capture fine detail, obtaining diagnostically useful morphological images poses more problems. The general solution proposed here is to set the camera mode to Aperture Priority (Av) and to make the aperture setting as small as possible. In the Av mode, the user chooses the aperture size and the camera adjusts the capture duration so that the sensor receives the amount of light required for good tonality given the sensor’s sensitivity. The advantage of using a small aperture is that it increases the available DOF in the image. This range of quality image capture is important because, especially in autofocus mode, it is easy to latch onto a hair shaft many millimeters or even a centimeter or more above the skin. The greater DOF increases the likelihood that the skin surface is also in good focus and therefore little diagnostic detail is lost. With the proposed Canon 100mm Macro lens, an aperture setting of f/32 is possible – a very small opening. However, the increased depth of field comes with a cost. The smaller aperture reduces the amount of light reaching the sensor and possibly adds diffraction effects that degrade the detail required for good diagnostic performance.[7]
If the Speed setting (capture duration) is not lengthened so as to catch more light, the resulting images taken with small apertures can suffer from the presence of dark regions with coarse luminance quantization. The trade here is that the longer durations that provide more captured light also can result in the image being blurred if there are even small amounts of camera (or patient) motion. The search for the optimal trade between focus blur (Aperture setting) and motion blur (Speed setting) will be ongoing. However, there is a range of solutions over which it is possible to have both small aperture settings and short capture durations. This advantageous conjunction is accomplished (with the aperture set at f/32) by increasing the flash illumination until the Speed setting is fast enough (1/200 s) to avoid much motion blur. A brighter flash has the additional advantage of increasing the domination of the flash over any variation in room illumination (daylight, incandescent, fluorescent) that could render inappropriate the custom white balance correction that is tuned to the spectrum of the flash. It has the disadvantage of more rapidly consuming battery power. In any case, care should always be taken, especially when imaging the face, to ensure that the patient’s eyes are closed or protected in some other manner when using the flash.[8]
As the camera is moved away from the minimum working distance (15 cm), the fixed manual flash setting used in Aperture Priority mode will result in the image becoming darker. The degree to which the images darkens can be monitored by displaying the image histogram on the LCD screen after capture. Depending on the lighting conditions of the exam room and the reflectance characteristics of the skin being imaged, an increase in the manual flash setting will often be required to compensate for changes in the working distance. At the point where the maximum flash setting (1/1) provides insufficient illumination for a given image, the camera mode should be switched to Fully Automatic. In this mode the camera is free to manipulate the aperture, speed and flash setting to capture an image with a tonality that conserves the visibility of diagnostic information; however, neither the DOF nor the susceptibility to motion blur is explicitly controlled as is the case when using Aperture Priority mode. In addition, as mentioned above, when the proximity and intensity of the flash are no longer able to dominate the scene, the contribution of other sources of illumination in the exam room may become manifest in the image. While it is true that in Fully Automatic mode the color balance is adjusted by the camera to compensate for the illumination changes, the correction is seldom complete or sufficiently accurate and differences in appearance across images will be apparent.
Menu Settings
When a camera problem occurs and there is a patient in the exam room, it is perhaps not the best time to gaze upon the index of a manual for the very first time. Before image capture is attempted in the clinic, an effort should be made to become familiar with the layout of both the camera and macro flash manuals supplied by the manufacturer. Among the information listed therein are the many camera settings that can be accessed through the electronic menus. These menu settings can be viewed by pressing the topmost of a column of five buttons just to the left of the LCD screen on which they are displayed. While supplemented by some dial settings and a few button-dial combinations, the electronic menu display presents the majority of the camera control possibilities. Most menu options select values for the various parameters, however, a few options are used to initiate procedures. The menu options and the settings currently recommended for teledermatology are reviewed below, but for complete setting details and options, the manual should be referenced. The Menu of the Digital Rebel XT is arranged in five tabs (2 for shooting, 1 for playback and 2 for set-up).
Shooting 1
Quality: Large (fine)
Red-eye: Off
Beep: On
AF mode: AI servo
Metering mode: Partial
ISO speed: 100
Quality: This setting has two components – the spatial dimensions of the image and the image quality setting. The spatial dimensions come in large, medium and small (about 8, 4 and 2 Mpixels, respectively). The image quality can be set to fine and normal. These represent two levels of lossy JPEG compression. It should be noted that the manufacturer provides no metric (e.g., Q factor) for the degree of compression applied at either level and, in any case, there is dearth of research in dermatology that defines and validates the relation between image corruption and diagnostic performance. Until there is a standard that covers the documentation of RAW image processing, it is perhaps best to stick with a lossy format (JPEG) that has fewer unrecorded degrees of manipulative freedom, even with the lack of validation. Until there is evidence of advantage or necessity to the contrary, images will be acquired with the highest spatial resolution (Large) and with the least amount of compression (fine). Although actual performance will vary with the subjects and with other camera settings, the manual suggests that about 290 (Large/fine) images will fit on a 1GB CompactFlash card. The number of images that can be stored in the space remaining in the CompactFlash card with the current quality and resolution settings is displayed in brackets on the LCD panel.
Red-eye: This image artifact occurs when the flash is close enough to the optical axis of the lens so that a direct reflection can be captured off of the back of the eye – a reflection that is chromatically filtered by the vascular-rich choroid. This problem can be avoided by presenting a short flash of light just prior to image capture. The flash of light will often cause a pupillary reflex that constricts the opening sufficiently to block the path of the reflection from the choroid to the sensor. In any case, red-eye should never occur in any of our clinical images because the patients’ eyes should always be protected from the flash.
Beep: There is no advantage to covert operation. The auditory feedback provides additional confirmation of the camera’s operation in what can be a distracting environment.
AF mode: When the shutter button is pressed halfway the camera can be set to focus once (One shot) or to predict the focus needed for uniform changes in depth (AI focus); however, it is most useful to have the camera continuously sample the image and to refocus repeatedly until the image is acquired (AI servo). The refocusing will minimize the focus error that attends the slight, and not so slight, motions of handheld operation. The cost to this option is the use of the battery power to drive the lens motors.
Metering mode: This option allows you to select the degree to which the periphery of the field of view contributes to the setting of the tonal quality of the image. By selecting Partial metering, only the central 9% of the scene in the viewfinder is used. This selective metering may improve the visibility of detail in pigmented lesions (perhaps at the cost of the appearance of the surrounding noninvolved skin). The icon for this selection is two horizontally oriented parentheses in a box.
ISO speed: In digital cameras, the ISO setting establishes the relation between sensitivity and image noise. This value determines the sensitivity of the capture process to light. It is the digital analog to an older rating system for film. The higher the ISO number the greater the sensitivity. Also analogously to film, the greater the number the greater the noise content (but for different reasons than for film). For teledermatology, the ISO setting is chosen to be 100. This is the least sensitive setting and has the least image noise. The low noise setting is a luxury that can be afforded as long as the flash unit can provide an abundance of light. In Fully Automatic mode, the ISO speed is set automatically based on the ambient conditions in the exam room within the range of 100 to 400.
Shooting 2
AEB: 0
Flash exp comp: 0
White balance: Custom
WB SHIFT/BKT: 0, 0
Custom WB: N/A
Color space: sRGB
Parameters: Parameter 2
AEB: Auto Exposure Bracketing increases the likelihood of obtaining a well-exposed image by capturing additional images both above and below the programmed exposure setting. The initial position taken here is that it may well take more time to sort repeatedly through and delete multiple surplus images with non-optimal exposures than to select an exposure that works pretty well for most body poses and clinical environments and then to alter that setting as needed. The 0 setting disables this option.
Flash exp comp: This setting allows you to alter the ratio of flash to ambient illumination. As an alternative to this feature, the flash amplitude is set using the flash control panel in manual flash mode. The 0 setting disables this option.
White balance: With this option, it is possible to select among six presets of varying color temperature (3200 – 7000 °K) as well as automatic (scene dependent) and custom (calibrated) settings. In the teledermatology imaging protocol, the custom white balance option (see Custom WB below) will be used for morphological shots and the automatic setting will be selected for contextual shots.
WB SHIFT/BRT: The White Balance Correction feature allows the image white point to be shifted in a space defined by the Amber/Blue and Green/Magenta axes. This option will not be used because it is more advisable to apply an empirical, rather than a subjective, correction to the image white point when acquiring diagnostic images. The White Balance Bracketing setting allows multiple images to be obtained, each with a different color tone. This is largely an aesthetic option that should not be necessary with the proper use of the Custom White Balance feature.
Custom WB: Selection of this option initiates the importation of a new Custom White Balance setting. The procedure to create, import and activate a custom illumination compensation setting is as follows. Prepare to take an image of a plain white object. A stack of unused printer paper will do. Manually focus the surface. Select any white balance setting by pressing the down arrow of the Cross keys and turning the Main dial (AWB is good choice). Capture an image that has neither saturated or grossly underexposed pixels using the macro flash (check the image histogram). In the menu, select the Custom WB option and press set. Use the left/right arrows to select the white image that was just captured. Press set and the new profile will be imported. Select the second tab (Shooting 2) on the Menu. Press the down arrow of the Cross keys until the Custom White Balance icon is selected. Press set and the white balance options will appear. Select the Custom White Balance icon (a rectangle above and in between two triangles. Press set again. Subsequent images will be captured and displayed using the RGB ratios determined by the new custom setting. Unless there is a change in the exam room illumination environment (e.g., light from an outside window changes appreciably during the day, or from day to day), the custom setting can be obtained once and retained for future use.
Color space: The selection of color spaces for the representation of images relates to color management. Until a more detailed color calibration procedure is implemented, the sRGB setting is recommended.
Parameters: The Parameter setting allows adjustment of the image manipulation done by the camera largely for aesthetic reasons. There are two preset selections (Parameter 1 (vivid) and Parameter 2 (subdued)), three custom selections (Set 1-3), and a B&W setting that converts the luminance values in the color mosaic to a grayscale image. In making a choice here, it should be remembered that the goal in teledermatology is to make the displayed images as realistic as possible. In doing this, it may be desirable to compensate for losses during acquisition (e.g., MTF/sharpness correction) but boosting properties based only on subjective appeal (e.g., high saturation) should be avoided. To this end, the Parameter 2 setting is selected since all of its properties (Contrast, Sharpness, Saturation, Color Tone) are in the null position. Caution should be used here given that no details of the relation between the property settings and any image processing are made known by the manufacturer. Subsequent investigation will be required to see if the null settings do indeed produce the most radiometrically accurate results. At the very least, care should be taken to ensure that these settings do not corrupt the work of the color management utilities.
Playback
Protect: N/A
Rotate: N/A
Print order: N/A
Auto play: N/A
Review time: Hold
Protect: In a normal workflow, it is probably not worthwhile selectively to protect from mistaken erasure those images that are to be retained in the patient record. If, however, there isn’t time to enter the images into the workstation before acquiring images for the next patient, experience may prove it prudent to step through the retained images and to mark them against deletion before proceeding.
Rotate: There is utility to be had in maintaining canonical views of the skin both to provide consistent context and to assess changes over time more easily; however, it is likely that it will be more efficient to rotate images individually using the controls on the workstation than those on the camera in the case where it is decided not to use the auto-rotate option.
Print order: The creation of hardcopy images is not part of the current workflow.
Auto play: Automated Playback may be useful to create a slideshow to review the entire set of a patient’s images in the camera for quality and for completeness prior to the patient leaving the clinic.
Review time: With the Hold option selected, the image review is retained until he shutter button is activated by pressing it halfway down. Pressing the Info button will toggle among the three display formats (basic, full and no information).
Set-up 1
Auto power off: 8 min.
Auto rotate: Off
LCD brightness: Midrange
Date/Time Current
File numbering: Continuous
Format N/A
Shoot w/o card: Off
Auto power off: To reduce the consumption of battery power, the camera can be made to shut off after a fixed period of inactivity even though the power switch is ON. A subsequent press of the shutter button halfway will return the camera to active mode. The appropriate delay is a matter of taste and experience and will depend on such things in your workflow as the length of time needed to review an image or to reposition a patient.
Auto rotate: With this option selected, images captured in portrait mode will be presented in the proper orientation either on the camera’s LCD or on most viewers running on the workstation. Prior to acquiring an image with a change in the camera orientation, the macro flash unit should be rotated so that it is perpendicular to the major axis of the body part being imaged (independent of the orientation of the camera body). For a consistency in acquisition that will aid in subsequent diagnostic interpretation, the horizontal axis of the camera sensor should always be either parallel or perpendicular (never oblique) to the major axis of the body part being imaged. This will ensure that the lateral illumination will be maintained with respect to the lesion and not vary with the orientation of the camera body. With the 350D, if the optical axis of the camera lens moves appreciably out of the horizontal plane, it is possible that the auto rotate mechanism will be applied inappropriately. In particular, pointing the camera down may result in a rotation of the image. If this occurs sufficiently often, it may be best to leave the rotate option disabled and to set the display orientation manually either in the camera or on the workstation. Note that the initial review following capture will not display an image obtained in portrait mode vertically even though Auto Rotate is ON.
LCD Brightness: Illumination varies widely across exam rooms. The LCD brightness should be adjusted as desired or required. The cost to leaving the brightness set to the maximum is reduced battery life.
Date/Time: Of all the initial setup procedures, the setting of the time and date is perhaps the most important with respect to image identification. Other identifiers may not always be as unique. From the point of view of the teledermatologist, there is a need to avoid confusion among images from the different clinics using the same type of camera. If an image becomes orphaned due to a slipup in procedure, the date/time stamp may be the only clue to the identity of the original patient. This option allows both the time and date values to be set as well as their display format.
File numbering: The Canon Digital Rebel XT offers only a rudimentary file management capability. Each JPEG filename has a fixed format (IMG_####.JPG) with the numbers cycling from 0001 to 9999 before repeating. The image files are stored in sequentially numbered folders (###CANON). Each folder will hold up to 100 images. When either the folder number 999 or image number 9999 is reached, it is necessary to replace the CompactFlash card with an empty reformatted one to restart the numbering sequence. The camera has no capability to customize either image file or folder names so confusion of repeated filenames will be an ongoing concern. If there are 10 images per patient and 20 patients per clinic, the filenames will repeat every 50 clinics.
Format: Historically, camera software is buggy. It is therefore prudent to reformat the CompactFlash cards periodically as digital debris tends to accumulate. This is especially true if cards are used in more than one camera. Formatting should be initiated with caution, however, since any data on the card will be lost during the process. After selecting the Format option on the menu, respond OK to the query. This selection will cause all information on the card to be erased (even protected files). If a CompactFlash card doesn’t appear to work with a particular camera, reformatting may fix the problem.
Shoot w/o card: This option allows you to capture an image even though there is no CompactFlash card in the camera. This is a dangerous option since earlier images are overwritten by subsequent captures. Inattention to the state of the camera display (never a good idea) indicating that there is no card present would allow unlimited operation with only the last image surviving. It is normally disabled.
Set-up 2
Language English
Video system: NTSC
Communication: PC connection
Custom functions N/A
Clear settings N/A
Sensor cleaning: N/A
Firmware Ver. 1.0.3
Language: The default language is English.
Video system: Displaying images on a television is not part of the normal workflow.
Communication: The PC Connection setting allows the camera to be attached with a USB cable to a workstation. An alternative procedure that doesn’t tie up the camera is to install a USB CompactFlash card reader on the workstation. This latter approach frees up the camera to acquire more images during the download process. The clinic workstation needs to be VistA Imaging capable to allow image transfer into the patient record (with either approach). Also, the attachment of portable storage is a concern when accessing any patient data. Although CompactFlash card readers may qualify as ‘medical devices’ when used in conjunction with a clinical camera, care should be taken to ensure that their use is consistent with the evolving regulations in this area.
Custom functions: This option can be used to access some of the more esoteric features of the camera and to make them more convenient. At present, none of these features are incorporated into the teledermatology workflow.
Clear settings: When the cause of camera failure can’t be determined, use this setting as a last resort to restore function. After the parameters are reset to their default values, apply the settings outlined in this note.
Sensor cleaning: Do not use. When changing lenses, be careful not to allow debris to fall onto the camera sensor. Try not to hold the lens mount upwards when open where gravity will work against you. A squame or an eyelash will appear large compared to a pixel that is only a few microns across. Humidity and other contaminants in the air tend to bond material to the sensor. Your breath, however pleasant, is a common source of such adhesion. And never, ever touch the sensor or any surface inside the camera with anything.
Firmware Ver.: With complex consumer devices such as the Canon Digital Rebel XT problems often arise either in the internal operation of the camera or in interactions with other products. To correct issues that are uncovered, the camera firmware (camera internal programming) is often updated by the manufacturer. The current release (1.0.3) corrects a bug with the remote controller, fixes Auto Play so that it can now be stopped during playback, and improves communication reliability with some CompactFlash cards. Firmware version 1.0.2 corrected an extreme underexposure problem with some lenses, fixed the failure of the Auto Power Off function when set to more than two minutes, and fixed the incorrect White Balance setting when using an external flash. The manufacturer’s website should be checked periodically for new releases.
General Settings
In addition to the menu settings, there are a few other selections to be made for proper camera operation – aperture, focusing, and the macro flash settings.
Aperture: Rotate the Mode dial to Aperture Priority (Av). With the camera in this state, rotating the Main dial (the dial just behind the shutter button) will change the aperture setting. Rotate the dial until the aperture is set to f/32. The current aperture value may be seen in the center-top field of the LCD panel just to the left of the number of shots remaining. The panel is a display strip just above the main LCD window. This setting is sticky. Although a range of aperture settings may be applied by the camera when in Fully Automatic mode, the f/32 setting will return whenever the Aperture Priority mode is revisited.
Focus: By looking through the viewfinder, a pattern of seven rectangles can be seen superimposed on the field of view. It is possible to select one (or all) of these regions as the basis of the focus calculation. By pressing the AF point selector button, the upper right button on the camera back, the currently selected point(s) will be illuminated with a small red dot. By rotating the Main dial while a dot is illuminated, each position in turn (or all) can be selected. Select the central point. When capturing an image, try to position this region on a patch of skin away from any hair shafts. By pressing the shutter button part way prior to taking a picture, the red dot will flash (the beep will sound and the Exposure Confirmation Light will turn on in the lower right of the viewfinder) when the selected region is in adequate focus. When all seven regions are selected, only those regions with adequate focus will flash giving you a feeling for what areas are being properly captured.
There are two switches on the left-hand side of the barrel of the macro lens that affect the focusing mechanism. One switch selects between Autofocus (AF) or Manual Focus (MF). Select AF. When it works, AF can be a convenience and a time saver. By pressing part way down on the shutter button, the autofocusing mechanism attempts to adjust the lens and maximize the image sharpness in the selected AF region. With the AF mode set to AI Servo, the focusing will proceed continuously. As with other internal camera functions, the exact autofocus algorithm is unknown, but most varieties of this sort of computation tend to work well with vertical edges of moderate to high contrast and tend to fail with horizontal edges or low contrast. All patches of skin do not meet the criteria required to drive the focus mechanism. When AF doesn’t work, it can be a frustration.
MF techniques allow you to focus on minimally textured regions without depleting the camera battery (and your patience) by running the lens motor from one end of its range to the other, and back again. If you can’t achieve a focus lock, be sure that you are not trying to focus on a surface that is closer than 15 cm from the end of the lens. The second switch on the lens barrel controls the range over which seeking occurs. For morphological images, set the range to 0.31 meters.[9] For most contextual images if battery consumption is a problem, the 0.48 meter setting can be used; however, it is often more of an issue to keep track of the switch setting. If focusing difficulty persists, set the first switch to MF and manually rotate the lens barrel while looking at the scene through the viewfinder.
To improve the apprehension of fine detail, there is a viewfinder focus adjustment dial in the upper right of the viewfinder housing. Rotating this dial will add from +1 to -3 diopters of optical power to your view of the scene (but not to the image captured by the sensor). To a limited extent this will correct for your failing eyesight or aging prescription. Focusing with a handheld camera is a difficult skill that requires practice to master. Camera motion is your enemy. Not only will the movement itself generate blur in the image, it can move the plane of best focus away from your desired target before capture is completed. The good news is the capture of diagnostic-quality images with ease and regularity is not your problem – it is ours. Let us know if you have difficulties.
Macro Twin Lite: Move the power slider on the flash control unit to the ON position. If the flash batteries are charged, there should be a rising, high frequency chirp (of the sort only dogs can hear) and then the red light on the flash control panel should come on. If there is no sound and the light doesn’t come on (or it takes more than a few seconds), replace the flash batteries and place the used batteries in the charger. If you have to rotate batteries frequently (more than once a clinic), dispose of the old batteries and obtain new ones.
When the camera is in Aperture Priority mode, the flash unit should be in Manual mode. To do this, press the Mode button on the flash unit control panel until an M appears on the display. This is Manual mode. Press the SEL/SET button and then adjust the flash output by pressing the +/- buttons. Initially the flash output will be set to full power (1/1). While this will most rapidly consume the battery power, it will also allow the fastest Speed setting for the selected Aperture size. These settings will minimize motion blur. Be aware that using too high a flash setting may result in a washed out image. The distribution of the obtained pixel values should be checked by viewing the image histogram. The flash power should be adjusted as necessary to provide a good range of tonality while avoiding appreciable clipping. Another method of correcting the range of tonal values of the acquired images is to use the Exposure Compensation facility. When the camera mode is changed to Fully Automatic for context shots, the flash mode will automatically be set to the appropriate setting (ETTL). When the camera is returned to Aperture Priority mode, the flash mode is one of the few settings that is not sticky and must be reset to Manual each time the mode is switched from Fully Automatic back to Aperture Priority.
Clinical Imaging Protocol
The feedback inherent in our teledermatology model offers an excellent mechanism for (tactful) responses to induce any required corrections in method or intent. Experience has shown that with proper support, individuals with varying levels of experience can consistently acquire good images. The initial image acquisition in the teledermatology clinics will be accomplished with handheld operation. Use in the clinic has shown that the motion inherent in unsupported acquisition frequently results in image quality that is far from optimal. Capture of sharp, well-composed images will only come with practice. After the basic operation of the teledermatology clinics is in place, there should be time to finish the development of a camera platform that combines a monopod with a pistol-grip ball joint mount. Tests have shown that a platform of this sort will allow a wide range of camera pose and yet still provide safe and stable support. Later, improvements such as a custom spacer will be added to improve the support stability and to further improve blur control. In addition, an image documentation capability will be incorporated into the camera interface.
In the interim, it is possible to achieve an improved level of camera stabilization using your hand. Hold the camera in your right hand (the right hand because the shutter button is on the right). By folding the middle three fingers of your left hand over your palm and extending your thumb and little finger (like the surfer’s shaka sign), a bridge may be formed between the underside of the lens (thumb) and the patient’s skin just below the region of interest (little finger). With a bit of practice, camera motion can be reduced appreciably without having the finger bridge impinge on the field of view. Spanning the 15 centimeter minimum working distance should be within the range of most hands.
When examining a patient either for the first time or after a long time has passed since the last visit, it is desirable to conduct a full-body exam. This is standard of care in most dermatology clinics. What is different about teledermatology is that the same information obtained by visual inspection during a physical exam must be incorporated in the simulacrum of the patient’s skin that is sent back to the dermatologist. This digital representation needs to be conveyed with images of sufficient quality and detail that the signs of disease can be remotely apprehended. A shorthand list of the Teledermatology Imaging Procedure Checklist that includes the image capture order can be found in an Appendix below. Expanded details are discussed presently.
When beginning the examination, always capture an Electronic Medical Record (EMR) printout of the patient ID (name and SS#) as the first image. Doing this will serve as a delimiter for the subsequently acquired images which may lack unique identifiers. It will also be very useful if multiple patient image sets are retained on the CompactFlash card prior to transfer to the workstation. Depending on where you are, the patient ID may commonly be found on the green sheet or routing sheet. If necessary, and with a little practice, you can capture the patient ID by imaging an appropriate Computerized Patient Record System (CPRS) window on an LCD screen. Try, at all costs, to avoid using hand-copied identifiers. Manually copied data are prone to errors to an amazing degree. If somehow the normal chain of data transfer gets disrupted, an image with the correct ID will go a long way to repairing the procedural breakdown.
The next step in the imaging protocol will be to document the primary complaint and any issues that arise from the physical exam with contextual and morphological images. A contextual image often spans tens of centimeters on the skin and may be obtained in either landscape or portrait orientation. The proper camera pose will depend on the size and shape of the lesion and the major axis of the local anatomy. Instead of spending time swapping in a zoom or wide-angle lens (with the associated sensor contamination risk), the macro lens will be used for both contextual and morphological shots. Rotating the macro flash to a horizontal orientation will maintain a uniformity of illumination with respect to the skin across images. In portrait mode (camera rotated 90 degrees), the field of view can span up to a meter on the body given the length of a moderately-sized exam room (~5 meters, proportionately less with smaller rooms).
Contextual images will normally span less than a meter on the skin but should capture the region of interest and include at least one joint. For regions capable of appreciable articulation such as the neck or the wrist, it is desirable that the local anatomy be in a neutral or ‘at rest’ position and that the field of view be sufficiently large to disambiguate any pose. In practice with contextual shots, there is a trade that is present in the selection of the field of view. A wider field of view is helpful in that it captures more of the general condition of noninvolved skin. This is information that the dermatologist ordinarily apprehends without conscious effort in a face-to-face examination. In contrast, a smaller field of view that is only sufficient to disambiguate the region of interest anatomically is often more helpful by immediately directing the teledermatologist’s attention to the location of the complaint. As the field of view is widened, the number of both anomalous and benign features represented tends to increase while, at the same time, the resolution available to enable each of these features to subserve a clinical judgment decreases. Where in this range it is best to operate will depend on the impact these factors have on the dermatologist’s diagnostic workflow. How does the utility of the available visual cues versus the ability to access equivalent information from image annotations or descriptions from elsewhere in the exam notes or patient history affect clinical performance.
Color balance becomes a concern when the ambient illumination of an exam room due to the presence of several qualitatively different sources of illumination alters skin appearance in the contextual images, especially so as image acquisition varies across time or location. Positioning a white object near the patient is not always necessary but it does offer the advantage of providing a reference for white balance correction should accurate chromatic judgments need to be made at a future time. Any (unsaturated, not blindingly bright) white region can be used to color correct the image even if there are multiple sources of illumination. Illumination variation should not be a concern for the morphological shots. The proximity of the flash should cause it to dominate the reflection under most any condition. It is also helpful in maintaining good color balance to avoid imaging the patient with a light source (especially a window) in the background of the image
The issues of pose, however, are more of a concern. Repeatability of the orientation of the lesion images aids the detection of change. Unless unwanted cropping by the field of view limits the capture proximity, the images should be acquired as close as possible (as near as 15 cm). This practice will also aid in the uniformity of most lesion representations over time. Use either portrait or landscape orientation, but do not obtain images at an oblique angle to the major axis of the body parts. Care should also be taken to position the camera perpendicularly to the skin above the area of interest, especially over curved regions. This will maximize the region of skin that is in focus. Orient the flash perpendicularly to the major axis of the body part. Standardizing the capture procedure will minimize variations in illumination due to body curvature. Finally, take care to rotate the image electronically so that the illumination is oriented horizontally during viewing before the image is entered into the patient record.
Even with the correct pose and the correct flash orientation, in the absence of circumscribed regions of dense pigmentation, much of the skin’s surface is difficult to capture. If the autofocus mechanism will not latch onto any skin feature in the selected field of view and the lens continues to exhibit seeking behavior, you can shift the field of view to capture a region with vertical edges of high contrast. Press the shutter button part way and adjust the view until the camera beeps indicating acquisition of adequate focus, keep the button in that position, and return to the desired field of view. Try to maintain a constant distance from the skin so that the area of interest is sharply imaged. Press the button the rest of the way to acquire the image.
An alternate method of acquiring low contrast scenes is to learn to hold the camera in a fixed position relative to the patient and to adjust the lens using manual focus. Though mechanically more demanding, manual focus may well produce better results (when mastered). Another alternative of using intentional motion of the photographer to continuously adjust the focus so that an image can be captured en passant by anticipating when to press the button will likely result in both motion and defocus blur. In the end, however, use whatever works for you. Especially with morphological images, assume a comfortable body position that allows some support by bracing your arms against your trunk so as to reduce camera motion. Also, use a finger bridge when possible. Placing your feet slightly apart at a right angle to the optical axis might offer you better stability (think parade rest).
The best alternative for a good focus aid might be the use of medical photography labels. These labels often contain a metric rule (a pattern with no shortage of high contrast vertical focus targets), a uniform background adequate for white balance calculations, and room for the patient ID. Care should be taken not to obscure portions of the lesion with the label and to leave visible a sufficient portion of the surrounding noninvolved region for contrast and comparison with the area of interest. To this end, pathology stickers are an acceptable alternative and they are available in most clinics. A little preparatory work might be required if it is desired to used the sticker background for chromatic correction. Many common paper substrates contain whiteners and will fluoresce or are unbleached and appear tinted.
After each image is captured, it will be displayed on the camera’s LCD. Check the image histogram to be sure no pixels are saturated (totally washed out pixels will flicker) or that the bulk of the pixel values are not in the lower quartile of the histogram (indicating a muddy, dark image). If the image is too bright (dark) the flash level can be reduced (increased) manually or the Exposure Compensation can be decreased (increased). While detail on the LCD screen is not the best, it is possible to obtain an estimate of sharpness using the zoom feature. Similarly, gross errors in pose and composition can be caught by viewing images on the camera LCD screen. Pressing part way down on the shutter button will ready the camera for the acquisition of a new image.
If you wish to review the current (or any earlier image), press the arrow button just to the left of the LCD screen. Press the left (west) cross button to view earlier images (in sequence, latest first). When an image is present on the LCD screen, pressing the Info button will toggle among: full image, basic data and full data. The full data display includes an intensity histogram. An intensity distribution that clusters in the middle of the range is the most aesthetically pleasing. Distributions skewed to the right will appear washed out and to the left will appear muddy. If you are forced to choose, washed out (but not saturated) is a better option than muddy – more intrinsic reflectance information is preserved.
How should multiple lesions be represented in the patient record so as to maintain unique identification? How should identification be preserved if multiple lesions are within the same context shot? One way is to mark the skin with a nonpermanent pen such as the Devon Skin Marker (#31145785). The identifying numbers or letters should not impinge on the region of interest. They need to fall within the field of view of the morphological shot and yet still be legible within the contextual shot. After image acquisition, the purple markings can be removed from the skin with an alcohol wipe. An alternative labeling scheme would be to create a utility that can annotate images using the alpha channel such as with the GIF format. Still another option would be to create sidecar image files that contain the requisite information.
Uploading Patient Images to CPRS
The images that are inserted into the patient record should be able to visually recreate a physical exam. They should also provide information adequate for the diagnosis of individual lesions without their acquisition unduly burdening the clinic workflow. If at all possible, arrange for the transfer of the images into CPRS before the patient leaves the clinic. A step-by-step description of the procedure to do this is contained in an Appendix (Instructions for using VistA Image Capture).
In the future, guidelines will need to be developed for assessing image quality and for deciding what acquired content is superfluous so that the patient record is not clogged with images that add nothing to the diagnostic process. Both clinical and legal issues concerning the retention and deletion of acquired images need to be codified and streamlined. There is also a need to determine the adequacy of the captured images for diagnosis. The selection of individual images from among those acquired involves assessment of both image quality and image content. The workstation screen affords a far better venue for judging image quality than the camera’s LCD. Images that have appreciable amounts of focus or motion blur, have muddy or saturated regions, or have an aberrant pose should be deleted. Additional images should be captured if the required information is not present in the remaining images. An image should also be replaced if the global pattern of the condition and its position relative to the anatomy (context) is not adequately portrayed. For morphological images, there is the requirement that the desired diagnostic details be adequately represented. Finally, there is a need to assess the diagnostic adequacy of the entire image set. Since, at present, there are no standards for the deletion of images obtained in the exam room from those to be entered in the patient record, inclusion will be at the discretion of the care provider based on the completeness and quality of representation. At present clinical judgment, and common sense, will be applied.
If the access lamp (just to the lower right of the LCD screen) is blinking, image data is being read, written, erased, or transmitted. Do not jar the camera, open the cover to the CompactFlash slot, or remove the battery pack. To do so will risk damage to the data, the CompactFlash card and the camera. If power is turned off during one of these transfer activities (not recommended), the process should progress to completion and then the camera should turn off. If CompactFlash card storage space is a concern, the images should be deleted from the card after it is established that their transfer to the workstation was successful.
The penalties and benefits of implementing different versions of image capture and image transfer protocols in the exam process should be investigated. Especially in the beginning, a teledermatology exam will take more time than a standard face-to-face exam. Tuning the system will be an ongoing process. It is the stated goal to transfer images prior to the patient leaving the clinic. What are the costs of not doing timely image transfer? Can we measure this by observing the operation of the clinics (i.e., callback frequency)? What are the differences between the workflow of single caregiver versus that for multiple caregiver clinics (with perhaps some support staff)? We have PAs (with their supervising clinician), NPs, non-specialty clinicians, dermatology residents, and combinations of these. The sites may be operating under different business structures, e.g., contract or staff.
Bandwidth issues will continue to affect the quality of clinic operation. What are the trades among bandwidth availability, file size reduction algorithms and diagnostic quality? Should we compress contextual images and crop morphological images? How much surround (noninvolved skin) should be retained in the cropped images (a ratio, a fixed surround (in centimeters on the skin), or a fixed number of pixels on the display)? Are the savings worth the cost in light of the required staff time? What are the requirements of an entire clinic’s worth of dermatology images versus a single digital pathology slide? And finally, how much can new technological advances, such as wireless image transfer and optical image stabilization, be made to improve the clinic performance, both in reducing errors and in improving workflow?
As a work in progress, these are but a few of the questions that have been, and will continue to be, raised. The Appendices below contain a number of the implementation details that are currently being examined.
End of Business
Perform a post-clinic review of the equipment. Charge any batteries that are depleted. Check the CompactFlash card to make sure there are no orphaned image files. Patient image files should not be left on media that may be unsecured or used for other purposes. Check the physical integrity of the camera to ensure that it will be ready for the next clinic. If necessary, disassemble the camera so that it can be stowed in a manner that will keep it safe from theft, damage or loss of components. If the camera is going to be idle for a prolonged period (weeks), it is best for battery life that both the camera battery pack and the flash batteries be removed.
Summary
The development of the most effective teledermatology imaging protocol will continue to be a work in progress for some time to come. This flexibility will be required not in the least because of changes in both staff and equipment. This is a joint effort, an open source approach aimed at the incorporation of the best collective knowledge and adapting it to the needs of the staff. All are encouraged to experiment with the settings and procedures to try and find a process that works best for you.
All things considered, the choice of a particular workflow is a personal one. It is very ends oriented – whatever techniques that have the potential to produce good clinical images will be considered. If you have any procedural suggestions, please email them (Brian_Madden@urmc.rochester.edu). If portions of the text are confusing or wrong, please send those comments along as well. If there is an equipment malfunction that threatens to cause cancellation of a clinic, give me a call ((585) 275-4526). I have a complete capture system and may be able to get it to your site in time to avoid rescheduling patients.
Appendix: Teledermatology Imaging Procedure Checklist
Prep:
Check battery levels; replace expended units and recharge them
Check the mechanical configuration of camera, lens and flash
Check the CompactFlash card for adequate space and for any residual images
Check camera settings (Time/Date, ISO, Mode (Fully Automatic or Aperture Priority (f/32)), menu, AF and seek range, macro flash)
Image Capture:
Turn camera and flash power switches to ON
Set camera mode to Fully Automatic (green rectangle)
Flash screen should display ETTL
Shoot patient ID tag
[A] Shoot contextual image (move back as required to capture lesion and a joint)
Set camera mode to Aperture Priority (Av)
Press mode button on flash (change ETTL to M)
Press SEL/SET button on flash
Press +/- buttons on flash to increase and decrease brightness (1/1 is maximum brightness, the rest are fractions)
[B] To shoot a small lesion position end of lens 15 cm from skin; for larger lesions, move further away from skin (may need to increase flash or, ultimately, switch to Fully Automatic)
For additional lesions within the same context, go to [B]
For additional lesions outside of current context, set Fully Automatic mode and go to [A]
Review and select images for patient record and transfer to workstation
Assess image quality (tone, focus and color balance)
Finish:
Check battery levels for depletion and CompactFlash cards for content
Stow equipment in a secure location
Appendix: Instructions for using VistA Image Capture
Log onto system.
Insert CompactFlash card into the card reader.
Any modification of the images (cropping, compression, image resolution changes) must be done using image processing utilities on the workstation prior to being loaded into the patient record. When creating images of reduced file size, always be sure to enter the original image(s) into the patient record as well.
Initiate VistA Imaging Capture (either from Desktop shortcut Capture Client or under Programs > VistA Imaging Programs > VistA Imaging Capture 32bit). If a small box appears with the message Invalid Filename, close and ignore it.
Logon using User ID and Access codes used for CPRS.
Image acquisition (follow dialog boxes on left side of screen):
Click on Select Patient. Enter patient name (last name, first name) or first initial of last name plus last 4 of SS# in Patient Lookup box; press enter; identify your patient from the list (confirm identity by DOB, etc.).
Click on Select Progress Note (choose the patient encounter to which you want the images attached). Study Performed, Note Date, and Image Descr fields are automatically entered at this point; change Study Performed to read “Dermatology” rather than the default designation, “Note”; the Origin field should read “VA”.
Under the Doc/Image Type filed, select “Image”.
Under Specialty, select “Dermatology”.
Under Proc/Event, select either “Biopsy” (for lesions that are to be biopsied that visit) or “Photo” (for lesions that are simply being photodocumented).
Change Image Descr to a specific descriptor in the form of “condition, location”. With a condition such as “pigmented lesion”, “non-pigmented lesion”, “acute rash”, or “chronic rash” and an anatomical location such as “upper lateral left thigh”.
Proceed to the lower left hand box and click on the bar labeled with a drive (typically C:\ is displayed, or if you have an external device it will usually automatically recognize this as the source drive).
In the dialog box that opens, select the desired image files for that patient (you must hold down the Shift key to select a range of files or the Ctrl key to select multiple individual files), then click Open. The selected image files should show up in the lower left hand box.
Proceed to the check box to the right of the Capture button above and select it; a dialog box should then appear labeled Batch Capture Options; check off on Prompt for Image Description (DO NOT click off on Delete Image File from Image Import Directory); click OK.
A new box should appear in the lower left labeled Batch Capture List along with a series of up and down single and double arrows; move selected image files from above by clicking on the image file name (again you must hold down the Shift key to select a range of files or the Ctrl key to select multiple individual files) and then clicking on the downward pointing single arrow (hitting the downward pointing double arrow will move all files into the Batch Capture List, selecting one or all images from this list and hitting the upward single or double arrows will remove an individual image or all images from the list). NOTE: it is a good idea to preview images for quality control at this point if this hasn’t been done previously (in the camera or on the workstation using an image display utility (preferred)).
Click on the Capture button to finalize the capture; a dialog box labeled Confirm should appear stating the number of images and the image type(s).
A new dialog box will appear along with each image being captured labeled Batch Capture Image Description; enter a descriptor of the image of the image as follows: for the patient ID picture label, use “patient ID”; for the contextual image label, use “context, location”; for the morphological image label, use “morphology, location” (e.g., a specific location within the context or refer to a lesion number added with a skin marker). Click OK.
Click the Study Complete button.
A final dialog box will appear labeled Study Group is Complete; you can enter a long description of the patient’s history regarding the imaged lesions in this box (but know that the images will be attached to the note as well so there is no need to recreate all aspects of the patient encounter here); click OK.
Appendix: iMed Photography Consent
I understand that photographs and/or video may be taken during this treatment/procedure. I consent to the taking of such pictures/video and their review by authorized personnel for treatment purposes. I understand that the pictures/video may be used for educational and/or research purposes provided my name is not attached to them.
The above statement is built into the iMed consent system. All patients receiving procedures will have the process of photographic documentation explained to them. It will be part of the form they (electronically) sign. Those patients who are not having a consentable procedure will be asked to sign a separate photographic consent presented through the Dermatology Basic Consent form in iMed.
To obtain the electronic consenting forms when accessing patient information on CPRS, click on iMed Consent under Tools to open the iMed window. This option is only available on computers on which the iMed software is installed and the iMed signature pad is attached. A printable form for obtaining consent for patient photography is presented in the next Appendix.
► For patients who are having a procedure: Click on Dermatology (dermatology options should appear on the right side of the window). Select Consents-Basic. Select the appropriate procedure (e.g. Skin-shave biopsy).
Click Begin Consent at the lower right hand corner. On the VERIFICATION page that follows select Yes if the patient has decision making capacity. Click Next.
On the ANATOMICAL LOCATION AND SIDE page, enter the appropriate anatomical descriptors in the text box. Click Next.
On the PRACTITIONER OBTAINING CONSENT page, enter your name under Practitioner Obtaining Consent. Enter the supervising attendings name under Supervising Practitioner. Select Finish.
Click OK on the following page. Click Sign on the task bar at the right hand margin. The performing physician, the patient, and the witness (a person not part of the operating team) must sign using the electronic signature pad. The witness’s name must also be typed in.
Click Save to Chart on the task bar. When the processing is complete, close this window and return to CPRS.
► For patients who need only photography consent (these are patients who undergo no separate procedures requiring consent): Click on Dermatology. The dermatology options should appear on the right side of the window. Select Consents-Basic. Select Basic Dermatology Consent Fill-in. Click Begin Consent at the lower right hand corner.
On the VERIFICATION page that follows, select Yes if the patient has decision making capacity. Click Next.
On the CONDITION OR DIAGNOSIS page, select the appropriate skin condition. You can find the desired skin condition by clicking on the first diagnosis in the list. Typing the first letter of the entry you seek will bring you to that portion of the list (e.g., typing “L” will take you to Lesion, skin). Typing “U” will take you to Unlisted fill-in. With this selection, you can enter a custom descriptor in the box below. At this point in the documentation, use descriptors that are consistent with our disease decision tree algorithm (e.g., Acute Rash, Chronic Rash, Pigmented Lesion, or Non-Pigmented Lesion). Click Next.
On the DESCRIPTION OF TREATMENT/PROCEDURE page, select Not listed, fill in. In the box below labeled Facility Specific Information, enter “Photographs of skin condition”. Click Next.
On the ANATOMICAL LOCATION AND SIDE page, enter the appropriate anatomical descriptors in the text box. Click Next.
On the BENEFITS page, enter “Aid in the diagnosis and/or management of your skin condition”. Click Next.
On the ANESTHESIA PRACTITIONER page, select No. Click Next.
On the BLOOD PRODUCTS page, select No. Click Next.
On the PRACTITIONER OBTAINING CONSENT page, enter your name under Practitioner Obtaining Consent. Enter the supervising attendings name under Supervising Practitioner. Select Finish.
Click OK on the following page. Click Sign on the task bar at the right hand margin. The performing physician, the patient, and the witness (a person not part of the operating team) must sign using the electronic signature pad. The witness’s name must also be typed in.
Click Save to Chart on the task bar. When the processing is complete, close this window and return to CPRS.
Photography Consent Form
I understand that photographs and/or video may be taken during this treatment/ procedure. I consent to the taking of such pictures/video and their review by authorized personnel for treatment purposes. I understand that the pictures/video may be used for educational and/or research purposes provided that my name is not attached to them.
Please print name and date, then sign:
Physician: Date:
Signature: __________________________
Patient/surrogate: Date:
Signature: __________________________
Witness: Date:
Signature: __________________________
Witness: Date:
(second witness required if patient/surrogate signed with an “X”)
Signature: __________________________
(Note: Individuals involved in the procedure should not sign as witnesses.)